
Review: REEB Ti Donkadonk Fat B
January 4, 2021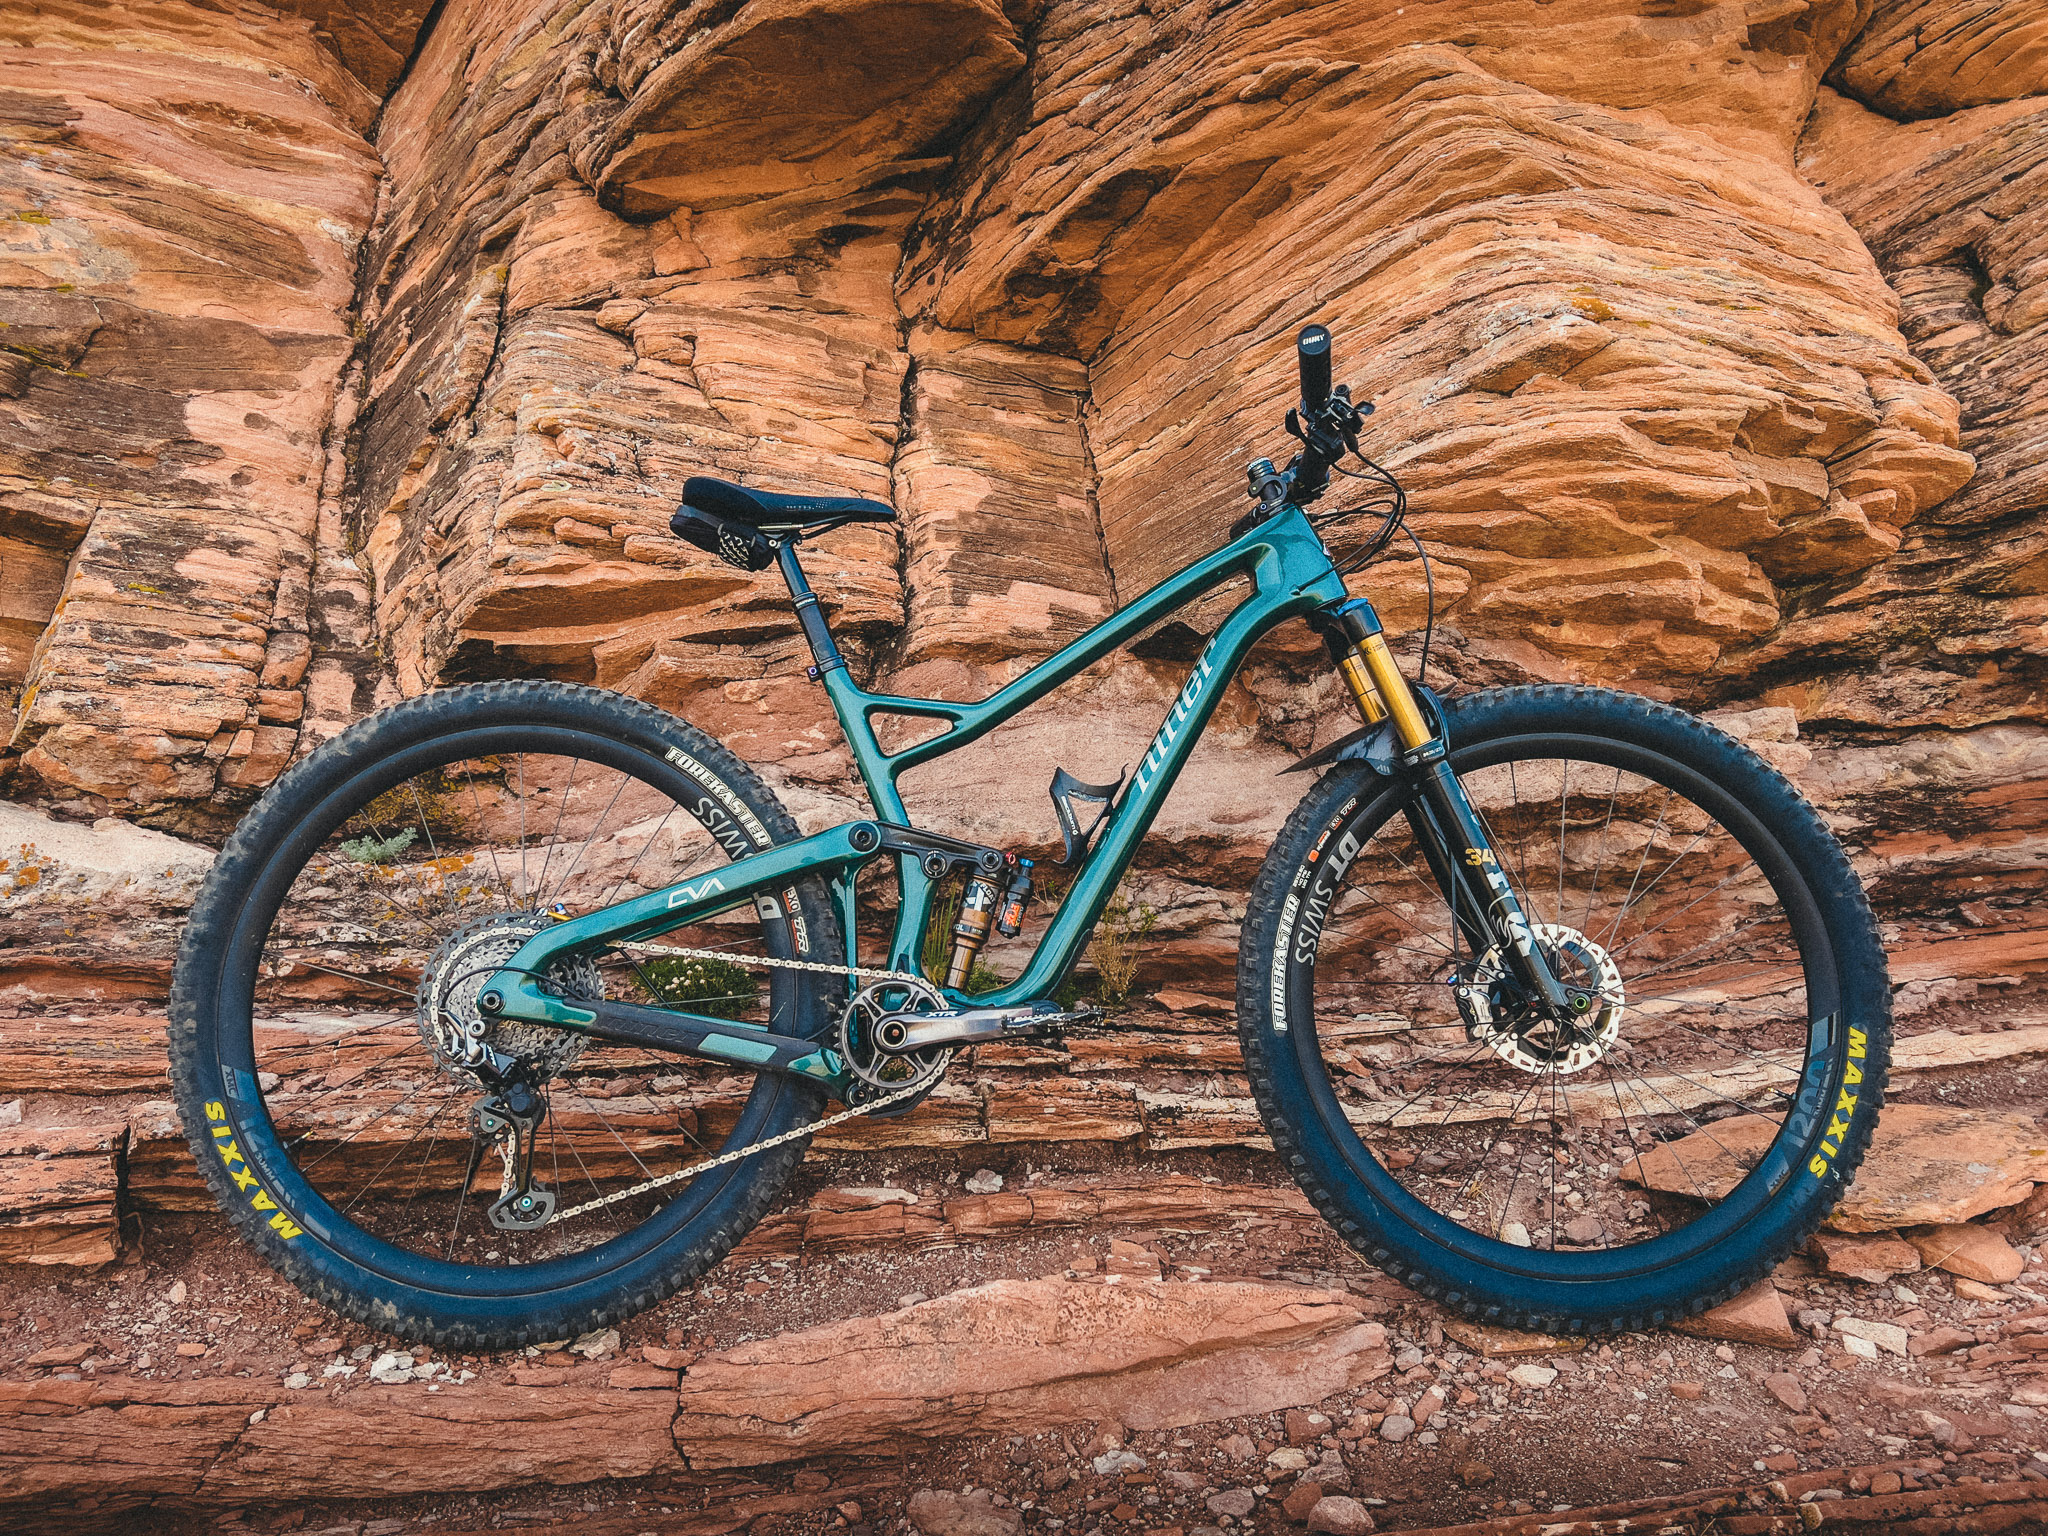
Review: Niner JET 9 RDO
August 22, 2022Maximum durability with minimum weight and cost.
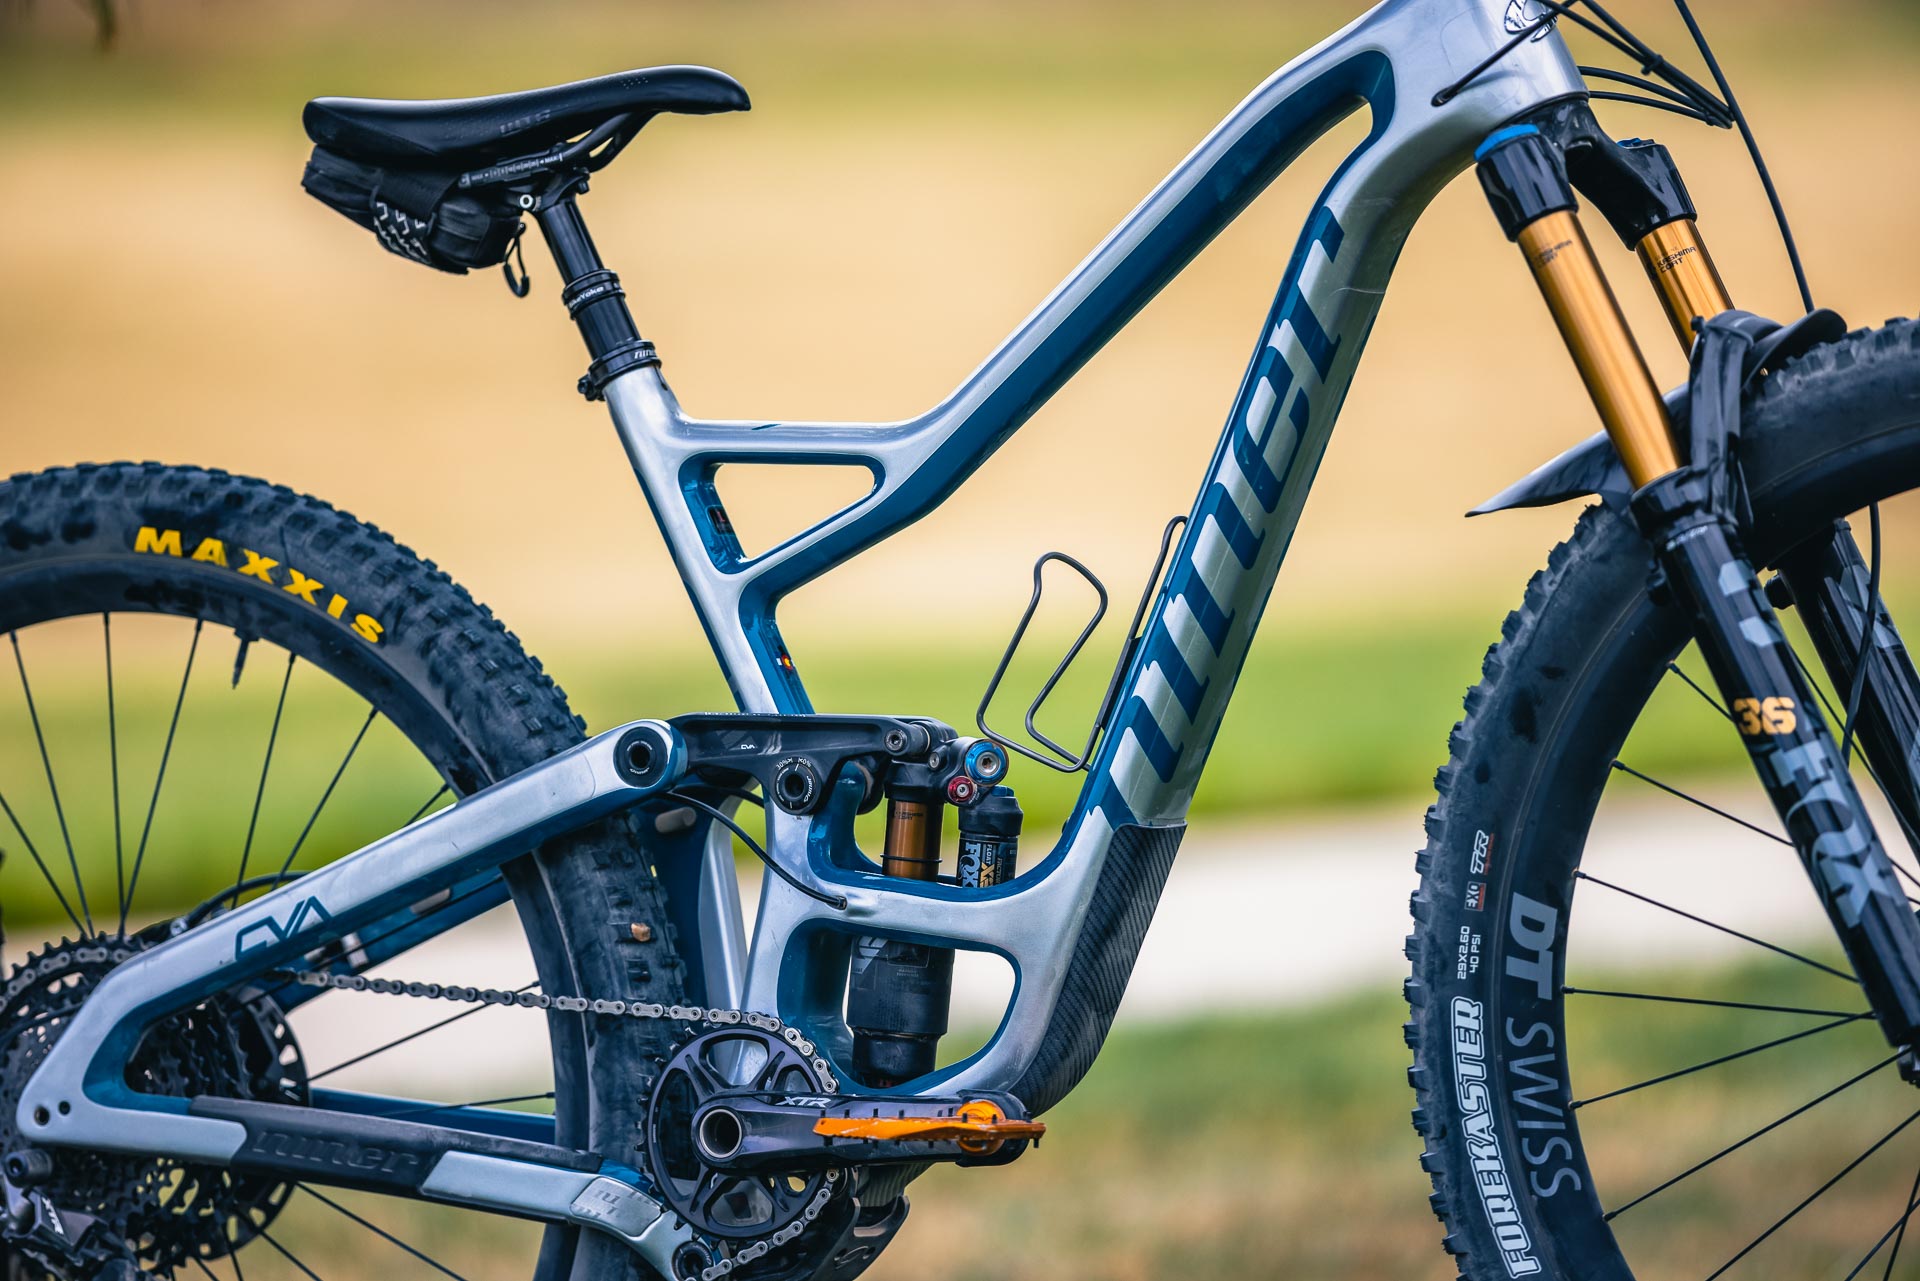
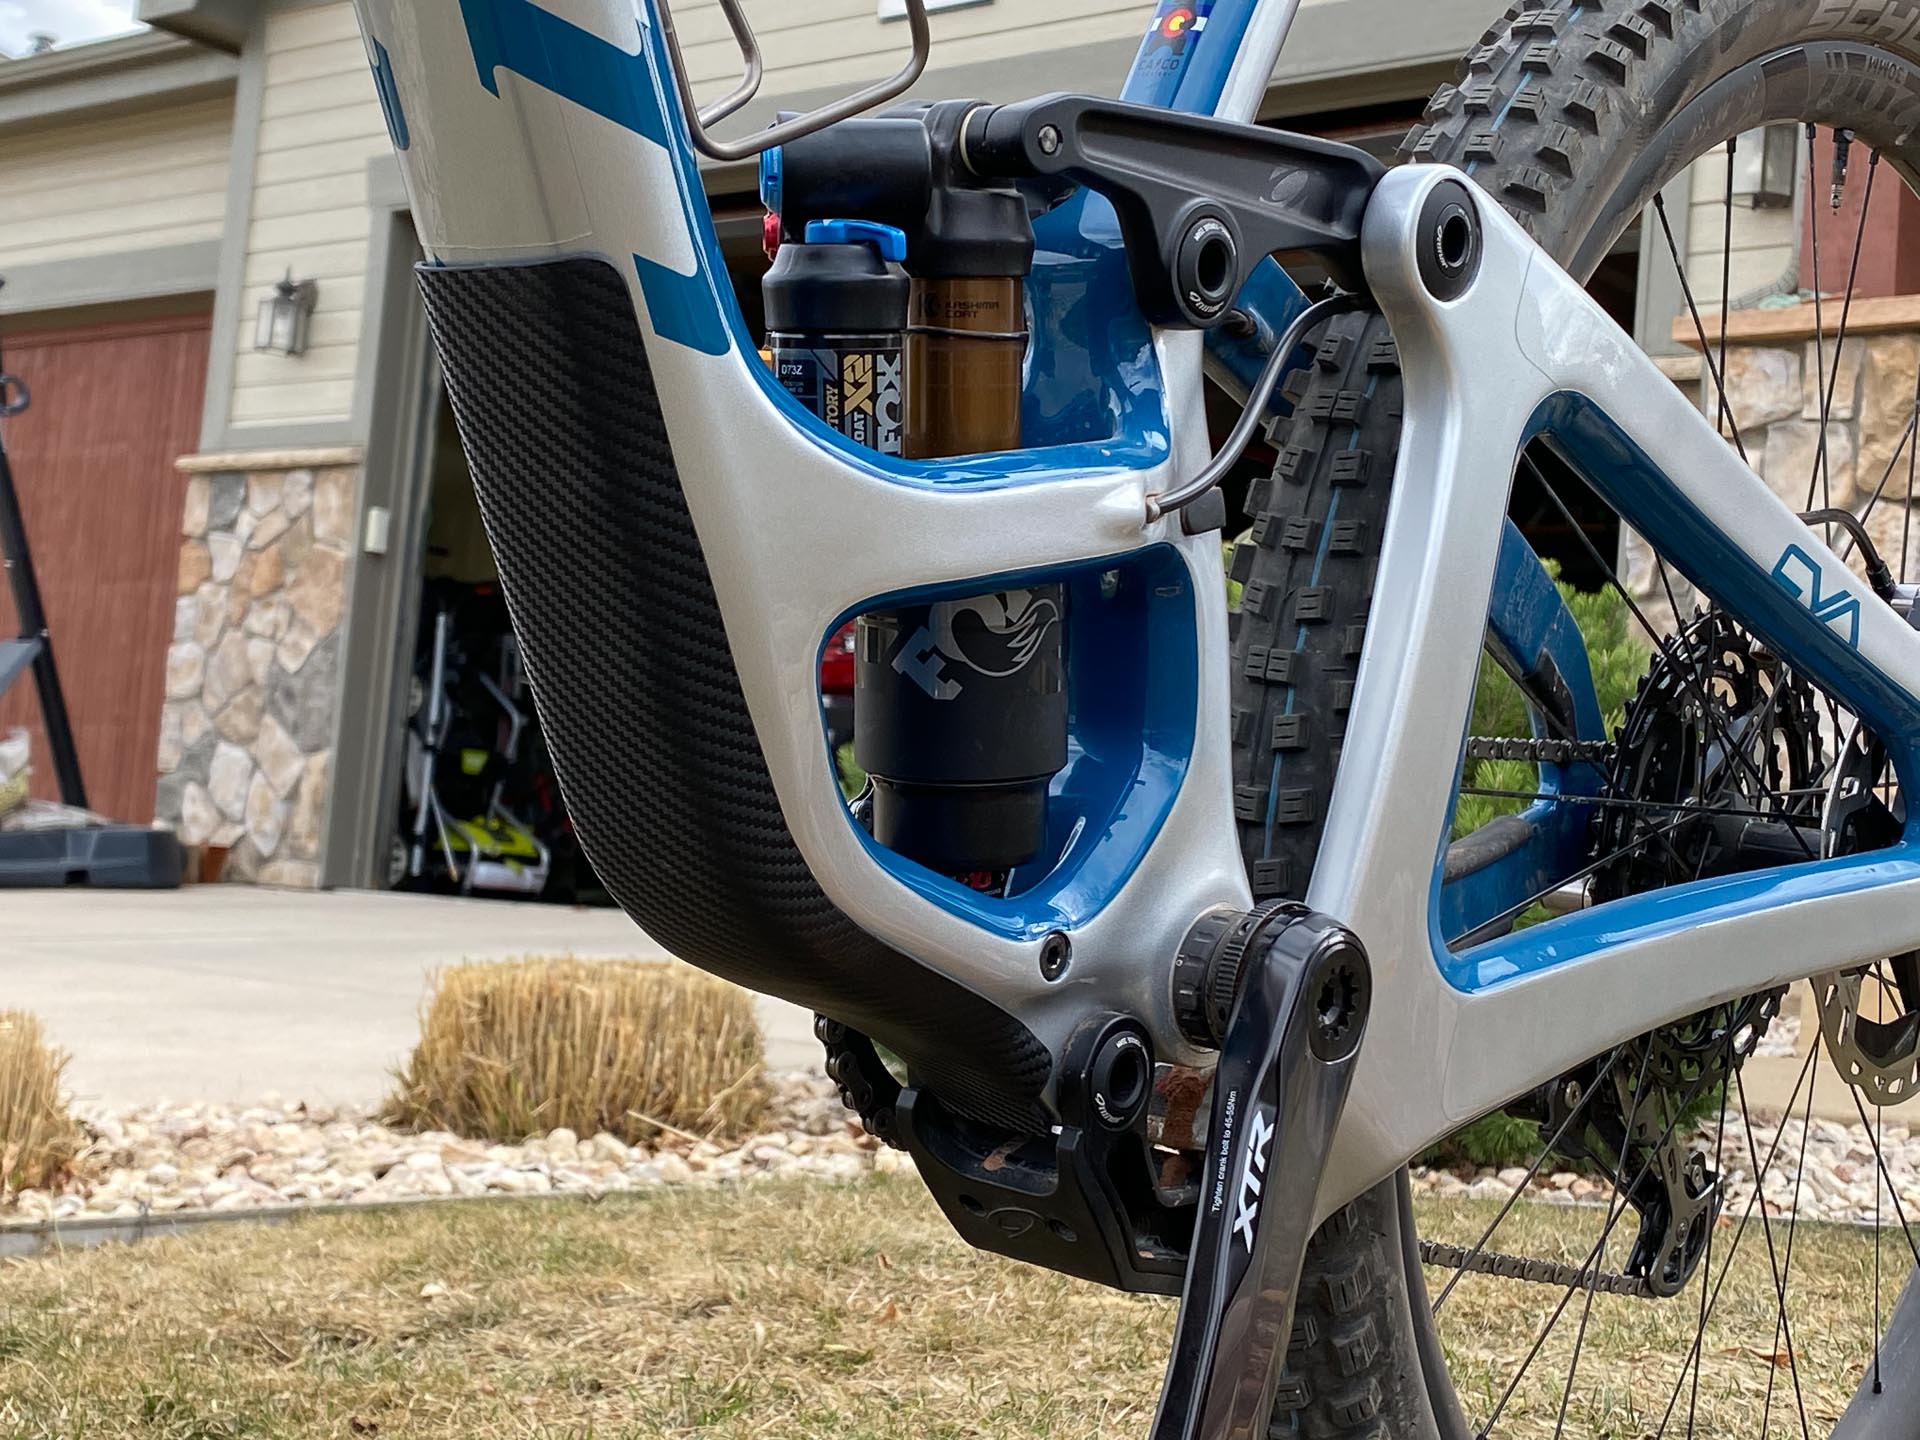
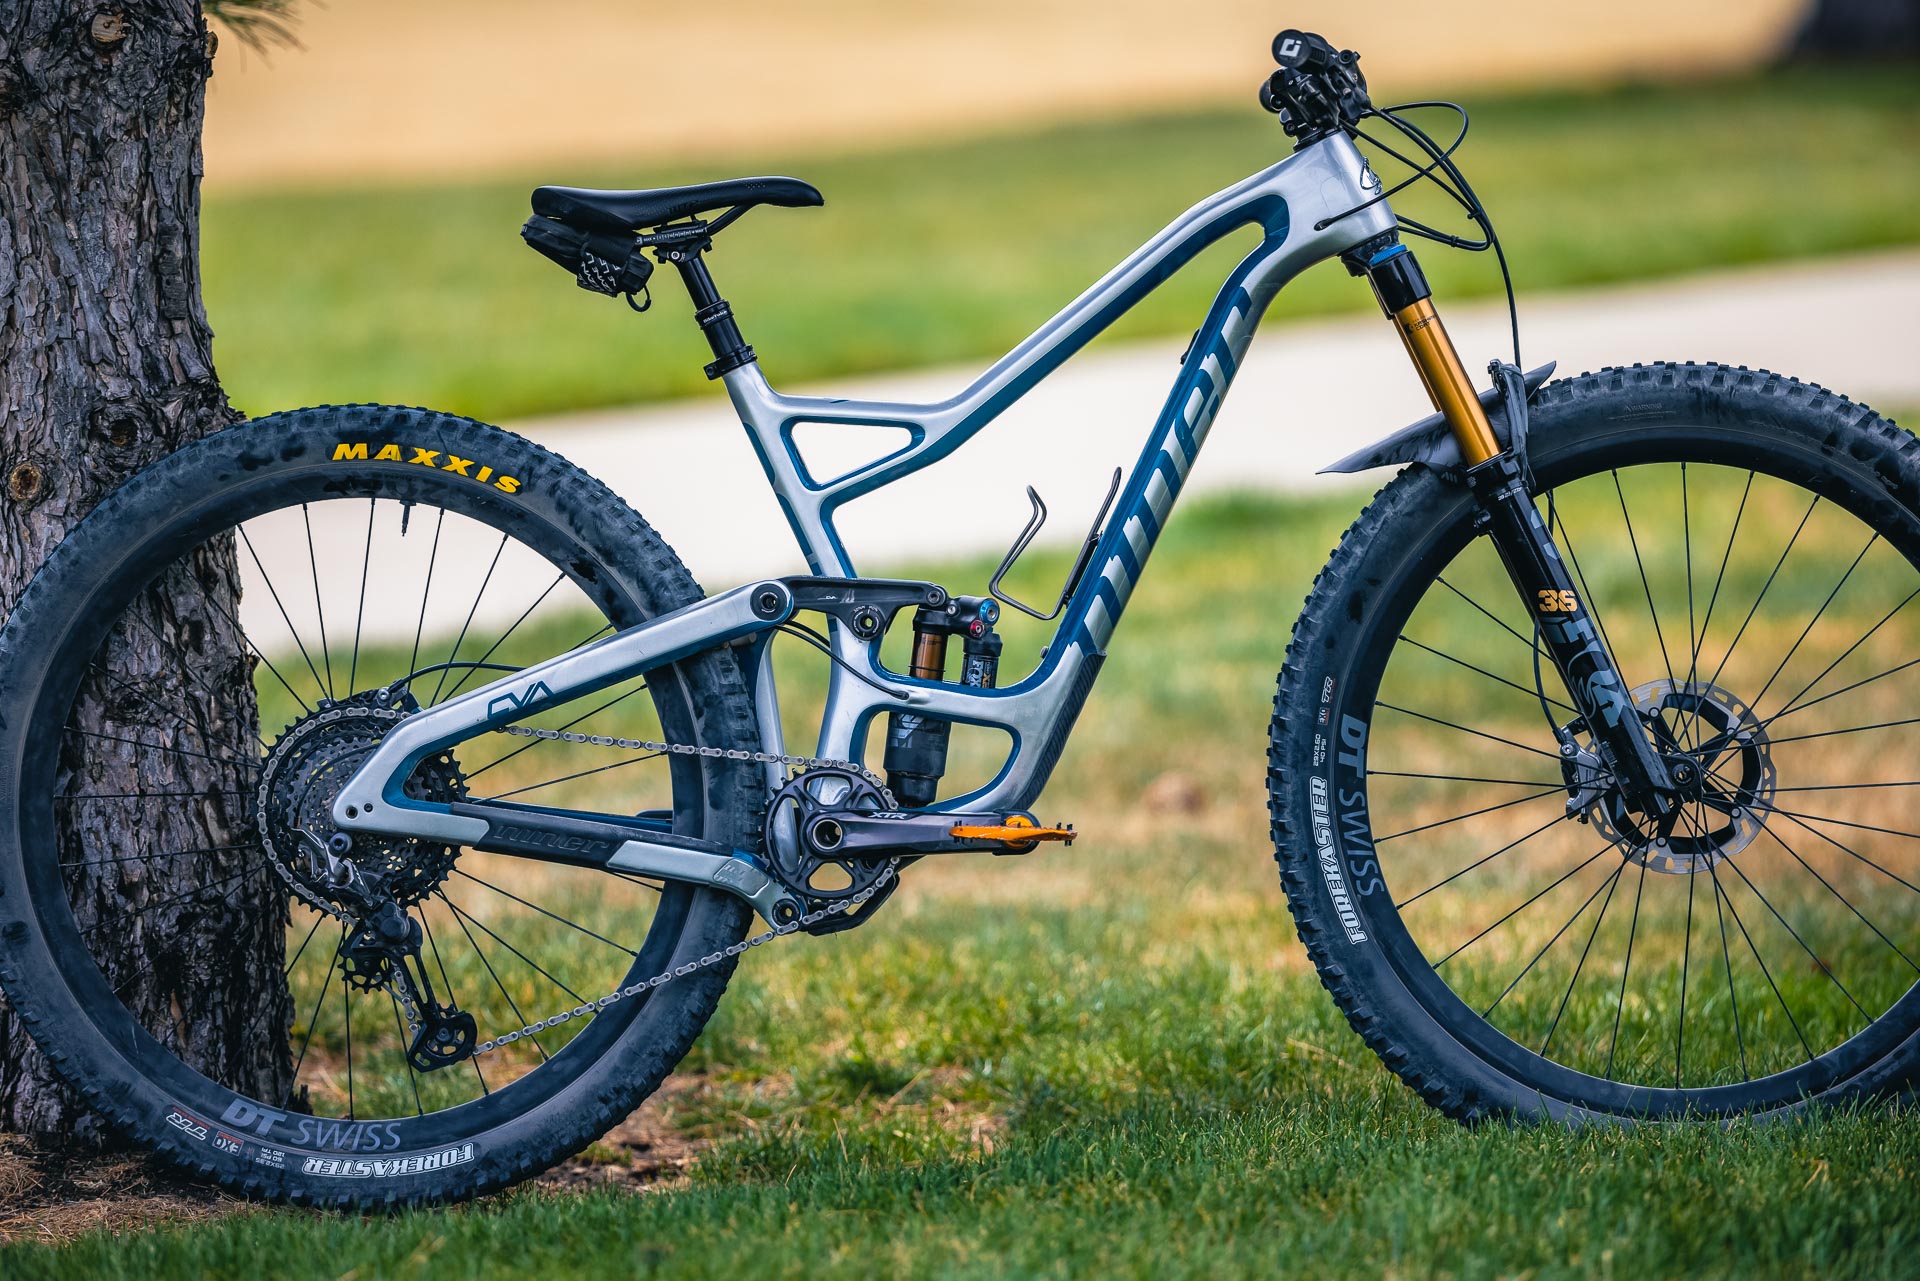
F or the most part, the standard frame protection that comes stock on mountain bike frames is decent, but it has limits. There's a lot of variability though, from thick screw-on plates to thin adhesive clear films. Unfortunately, those protectors are generally pretty minimal, both in thickness and coverage, which isn't surprising when manufacturer is trying to balance cost, aesthetics, advertised weight, and assembly ease. The rubber frame protection pads on my last Guerrilla Gravity Trail Pistol frame starting falling off after the first ride. The frame protection on my new Niner RIP 9 RDO has been solid, but after I took a rock strike to the paint on the down tube—just barely missing the stock rubber protector—I decided to take things a bit further.
How much protection?
In searching for replacement frame protection that could be customized to fit any bike shape, I didn't come across much. Of course, there's a plethora of various adhesive films (here's a Pinkbike review of 7 different films) but those films do very little against kicked up rocks that can hit your frame in excess of 20mph on fast descents. Those films are great for non-impact areas where you want some discrete protection against scratches and rubbing, like on chainstays for heel rub, or on the side of the head tube to protect against cable rub. But on the down tube… not so much.
For the most part, any flexible frame protection isn't going to do much for impacts. This includes those thin shuttle pads that are supposed to protect the frame when it's resting on the tailgate of a truck. I recently listened to a interesting podcast featuring Ruckus Composite Repair. He noted that it's pretty common for to see cracked carbon down tubes from being shuttled and the bikes bouncing around on the tailgate with your homie flooring it up the fire road.
Before we move on to the actual build process, I would just caution against thinking that this issue only affects carbon fiber frames. Aluminum frames in particular can sometimes be even more fragile than carbon because of how thin modern alloy tubing has become in effort to save weight. I can't speak for titanium and steel, but my guess is that denting and tearing of those materials is much harder to do, outside of a crash.
This is where Kydex comes in...
So how do you get a durable, hard, customizable frame protection? Kydex. Traditionally, Kydex is a very popular material for making knife and handgun holsters, but I've seen it creatively used for all kinds of things. It's basically a rigid thermoplastic that comes in flat sheets of varying size, thickness, color, and surface texture. Once it's heated (either with an oven or heat gun) it becomes very pliable and can be molded around nearly any shape, and it cools quickly where it hardens again. It can be re-heated and re-molded as needed. I decided to give it a go for a down tube protector on my Niner RIP 9 RDO. Here's my process, hope it helps you!
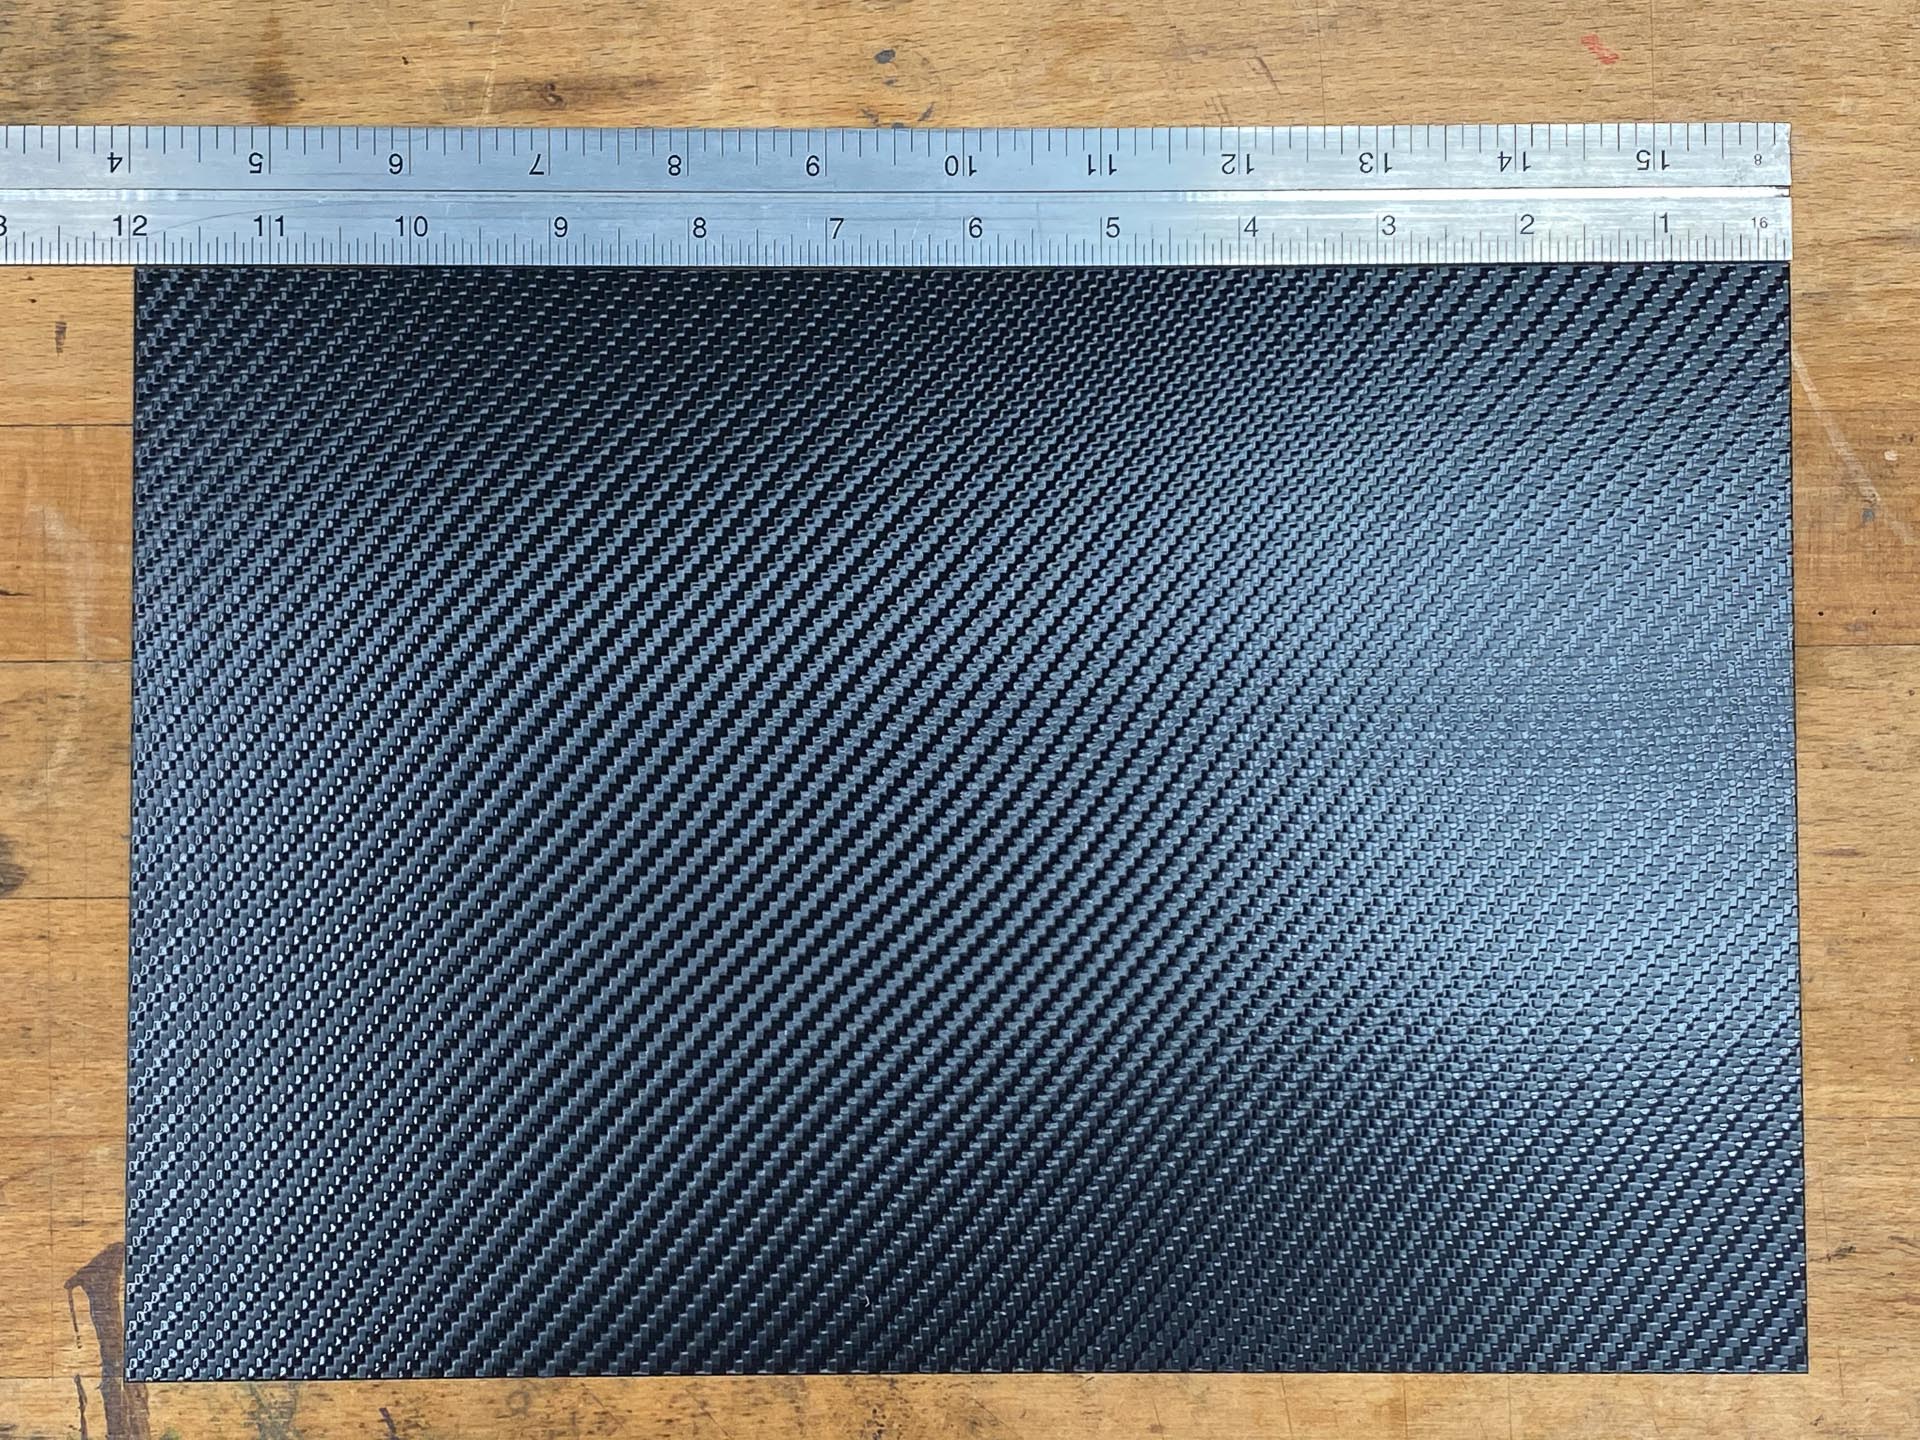
Step 1: Kydex
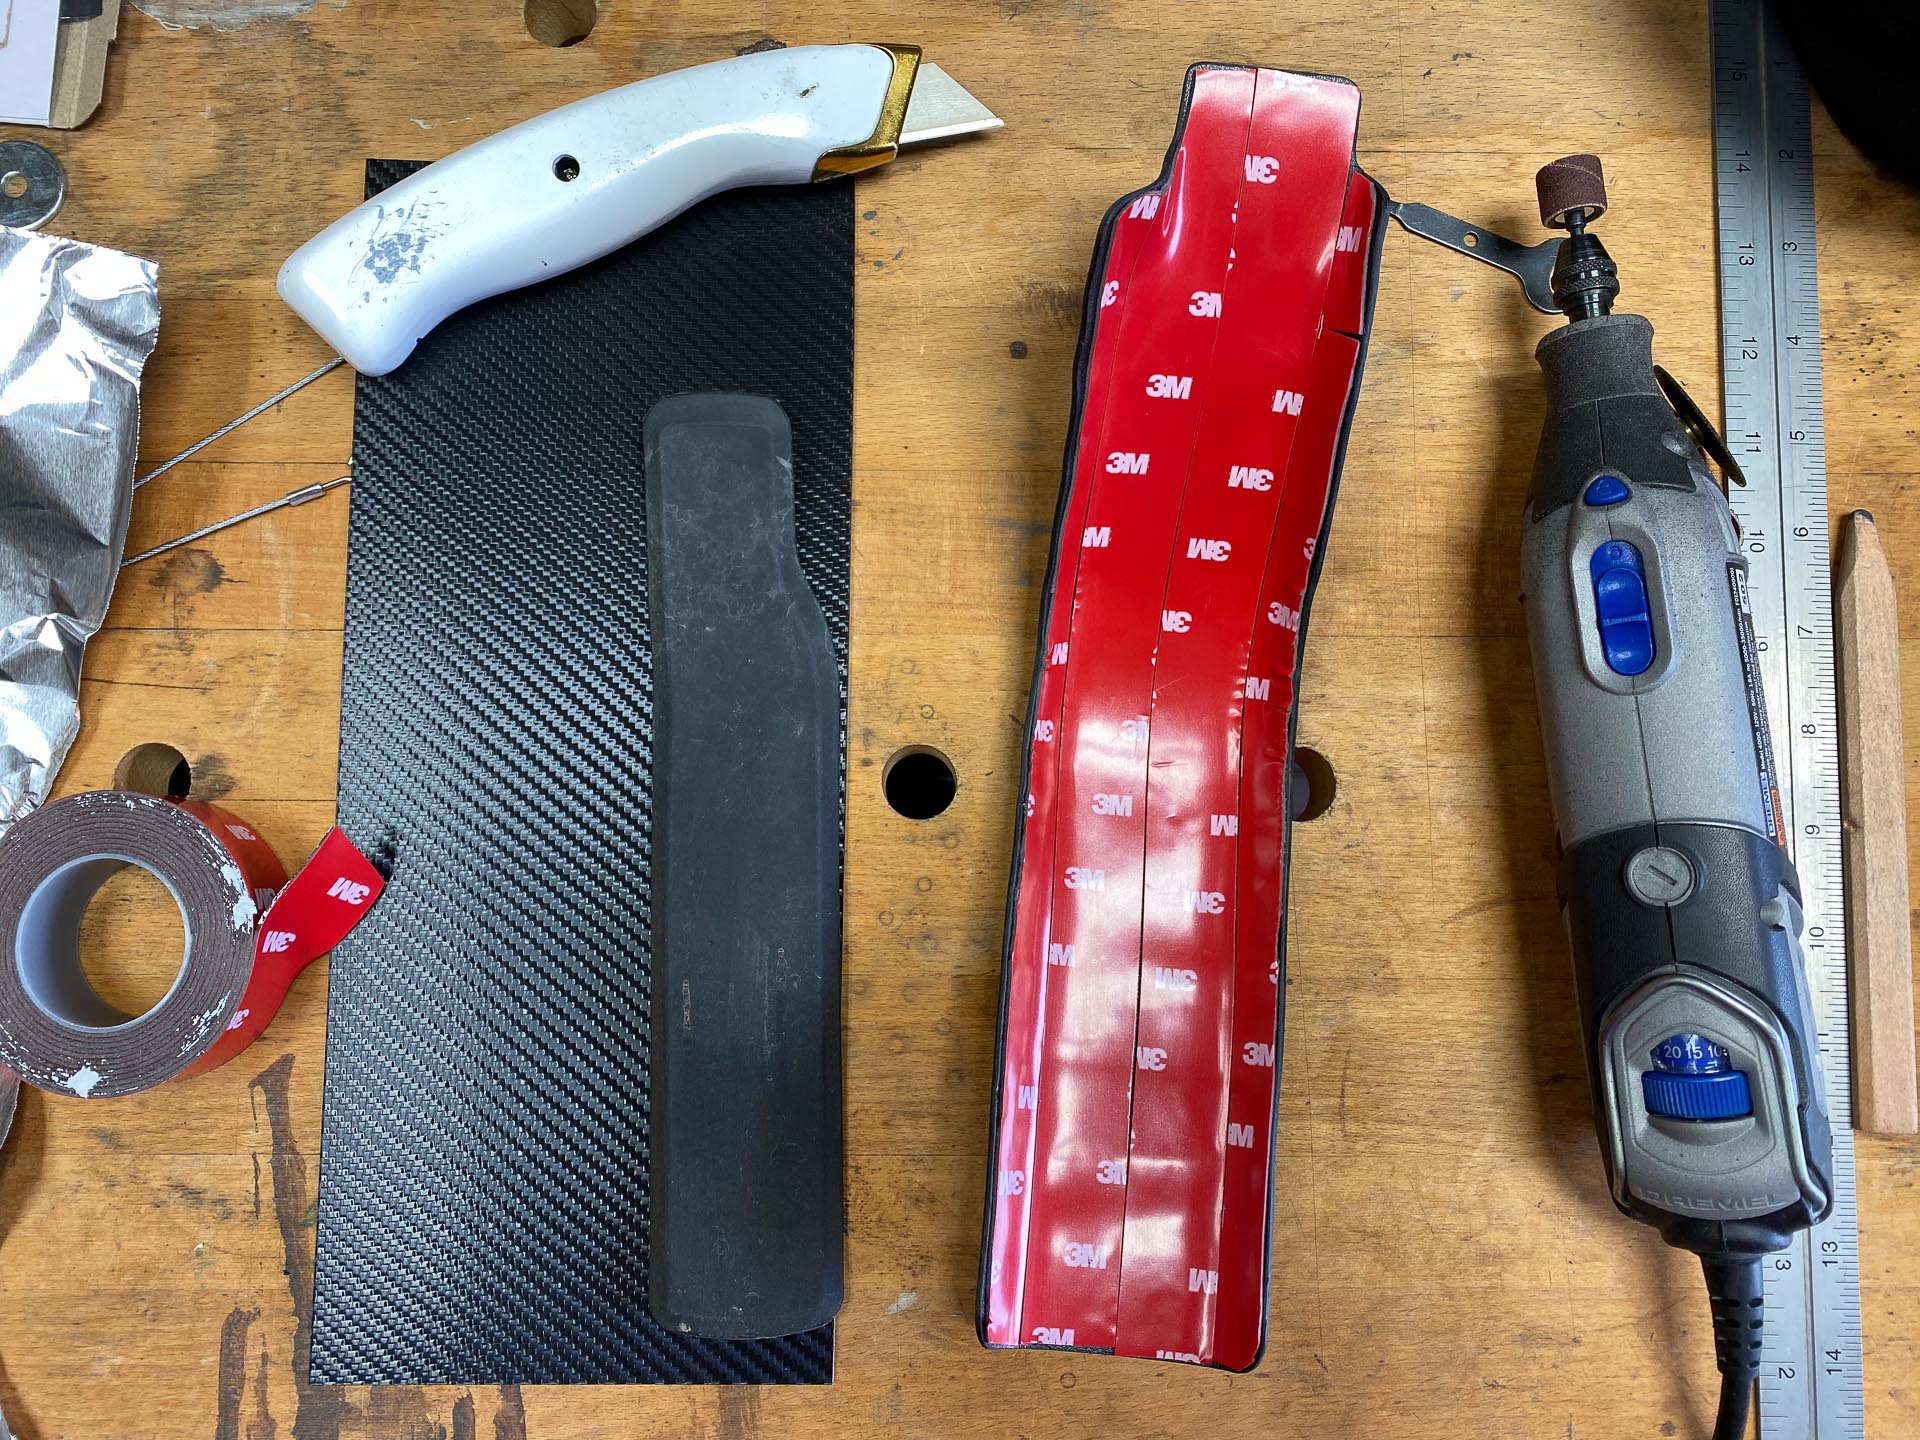
There are tons of options and places to buy Kydex. I purchased this 2-pack of 8"x12" sheets with a carbon fiber pattern for $25 from Amazon. This is labeled "thermoform plastic" instead of the trademarked Kydex name, but it's all the same basic stuff. The one I got is 0.08" (2mm). I would not go any thicker than this or it will be hard to mold. You can go thinner, but again, you'll sacrifice impact strength


Step 2: Prep
Here's the stock Niner protector. You can see it's small-ish size and the rock that crept around it to take a chunk of paint out. Second photo shows the stock protector removed. I used a heat gun to warm the stock rubber protector and it just pulled right off. Never leave the heat gun pointed in one direction for long or it WILL melt and destroy things. Patience is key. Remove any leftover adhesive either with a light solvent like Goo Gone, or simply use duct tape to pull it off. Rip off a small strip of duct tape (my personal fav is the black Gorilla Tape), hold each end and press it down on the adhesive you want to remove, and lift quickly. Keep sticking it down and pulling it up rapidly and lightly until all adhesive is removed. This generally works super well, and you don't have to get the messy Goo Gone out.
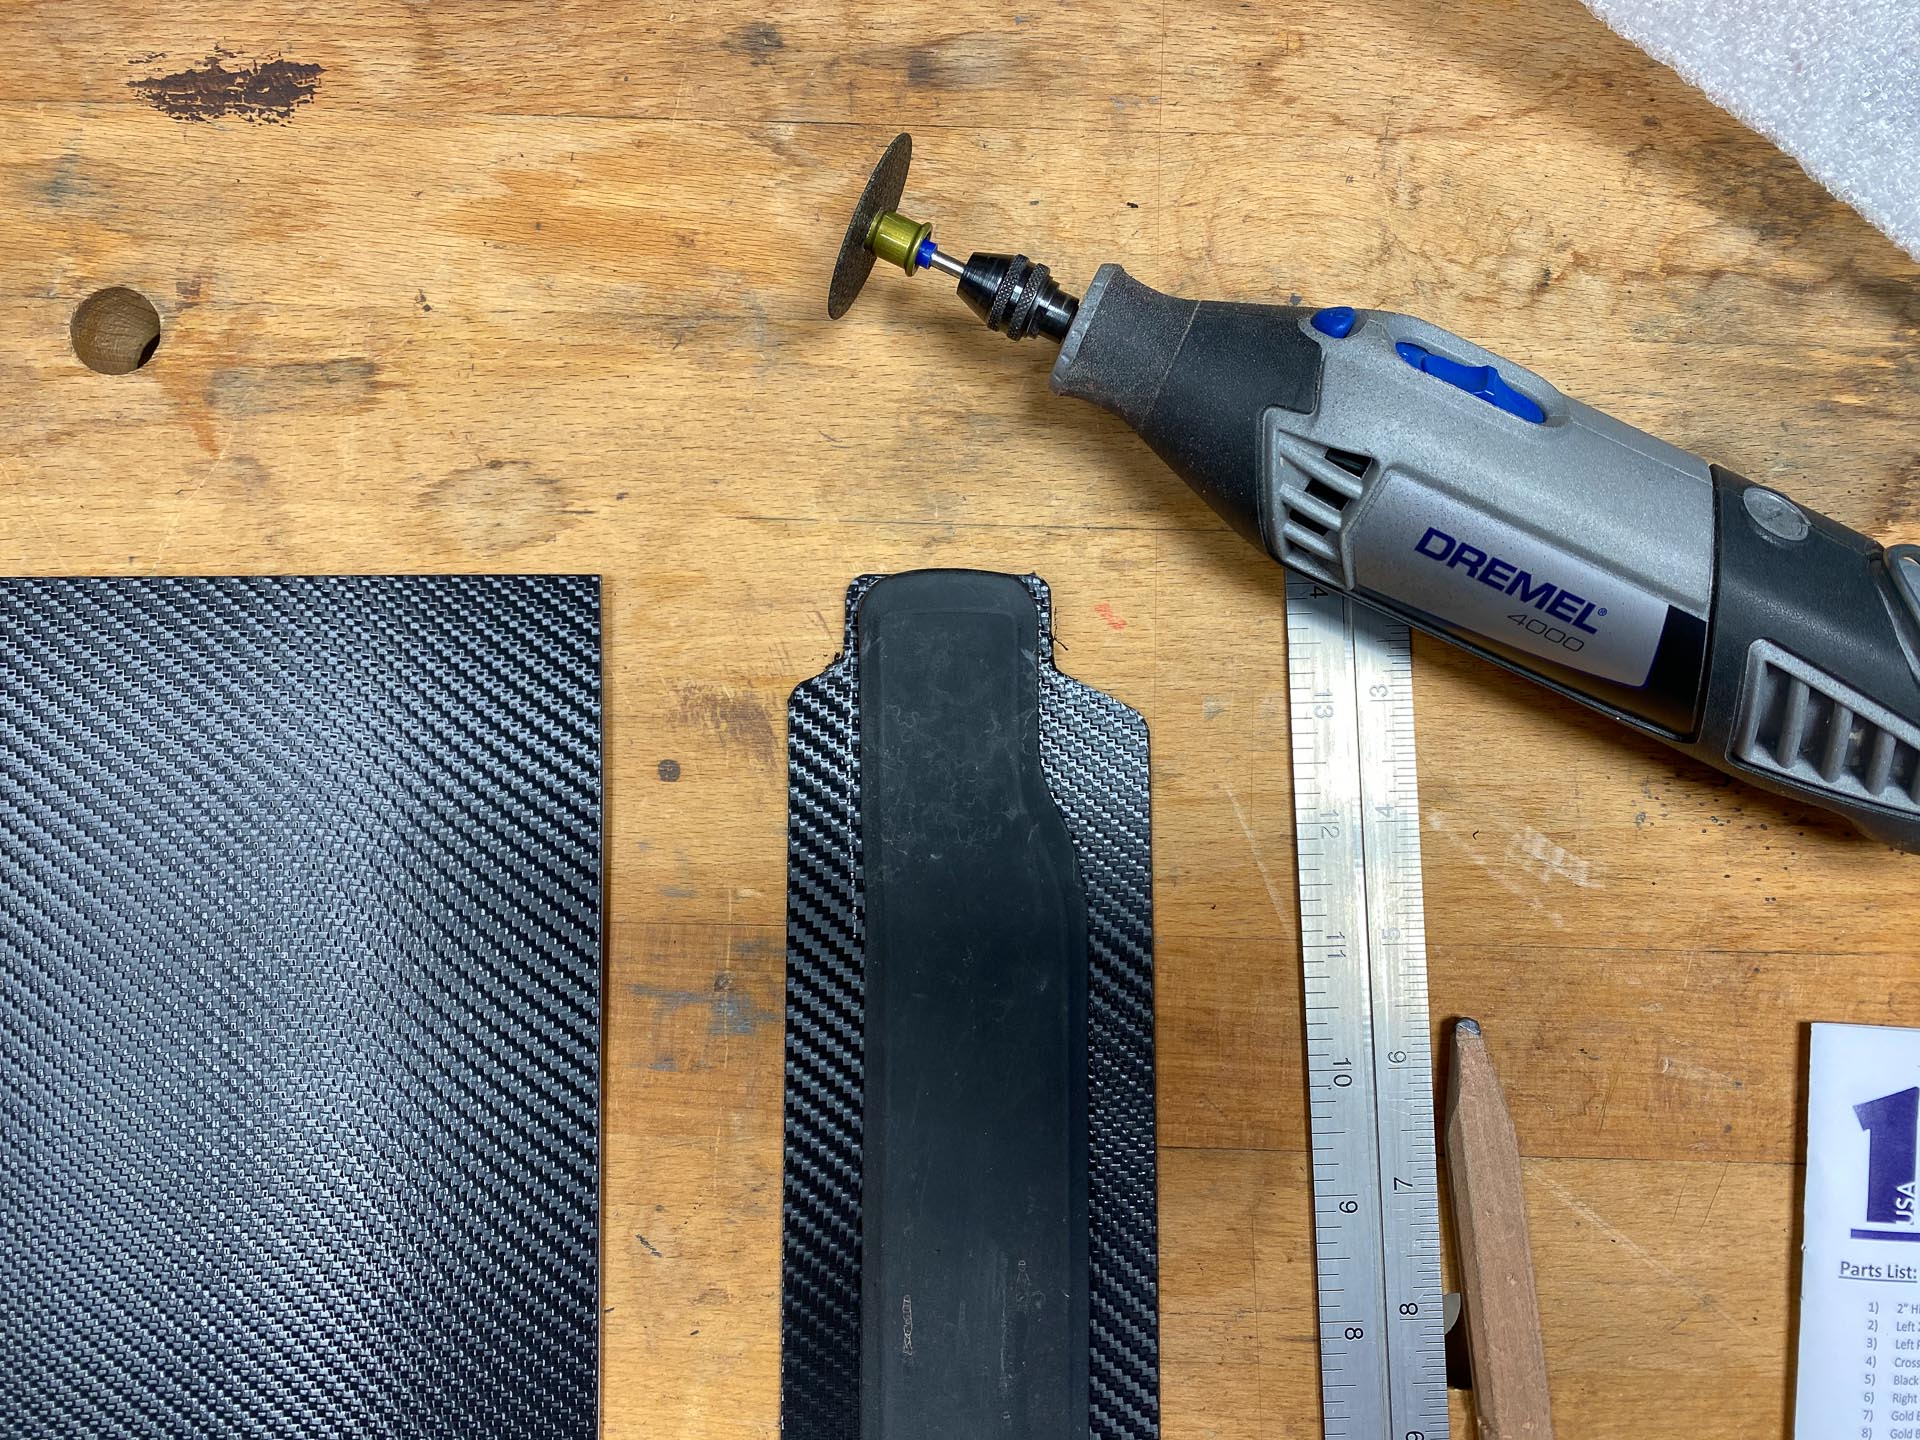
Step 3: Plan & Cut
Using the stock protector as a guide for shape and size, I penciled my new shape directly onto the Kydex. You could do an intermediate step here and draw/cut it out on paper to test fit and shape. Kydex is very easily to cut and shape with something like a Dremel, so err on the size of larger rather than smaller. You can always trim it down as you start to shape it, but if you make it too small, you'll have to start over. You could also cut the Kydex with a sharp razor blade (it'd be tough though), or a hand saw like a coping saw. Use a file to smooth out the rough edges if you use a saw or Dremel.

Step 4: Start Molding
Kydex requires heat to make it flexible. I recommend a heat gun. You can heat it in an oven or toaster oven (250-350F, start on the lower temp to avoid ruining it, and increase if more working time or flexibility is needed), but I've heard it can piss off your significant other if you do it in the kitchen. With a heat gun, you can more accurately control the temperature and placement of heat. I'm not going to soft-sell it though, this process takes patience, but it's hard to truly mess it up.
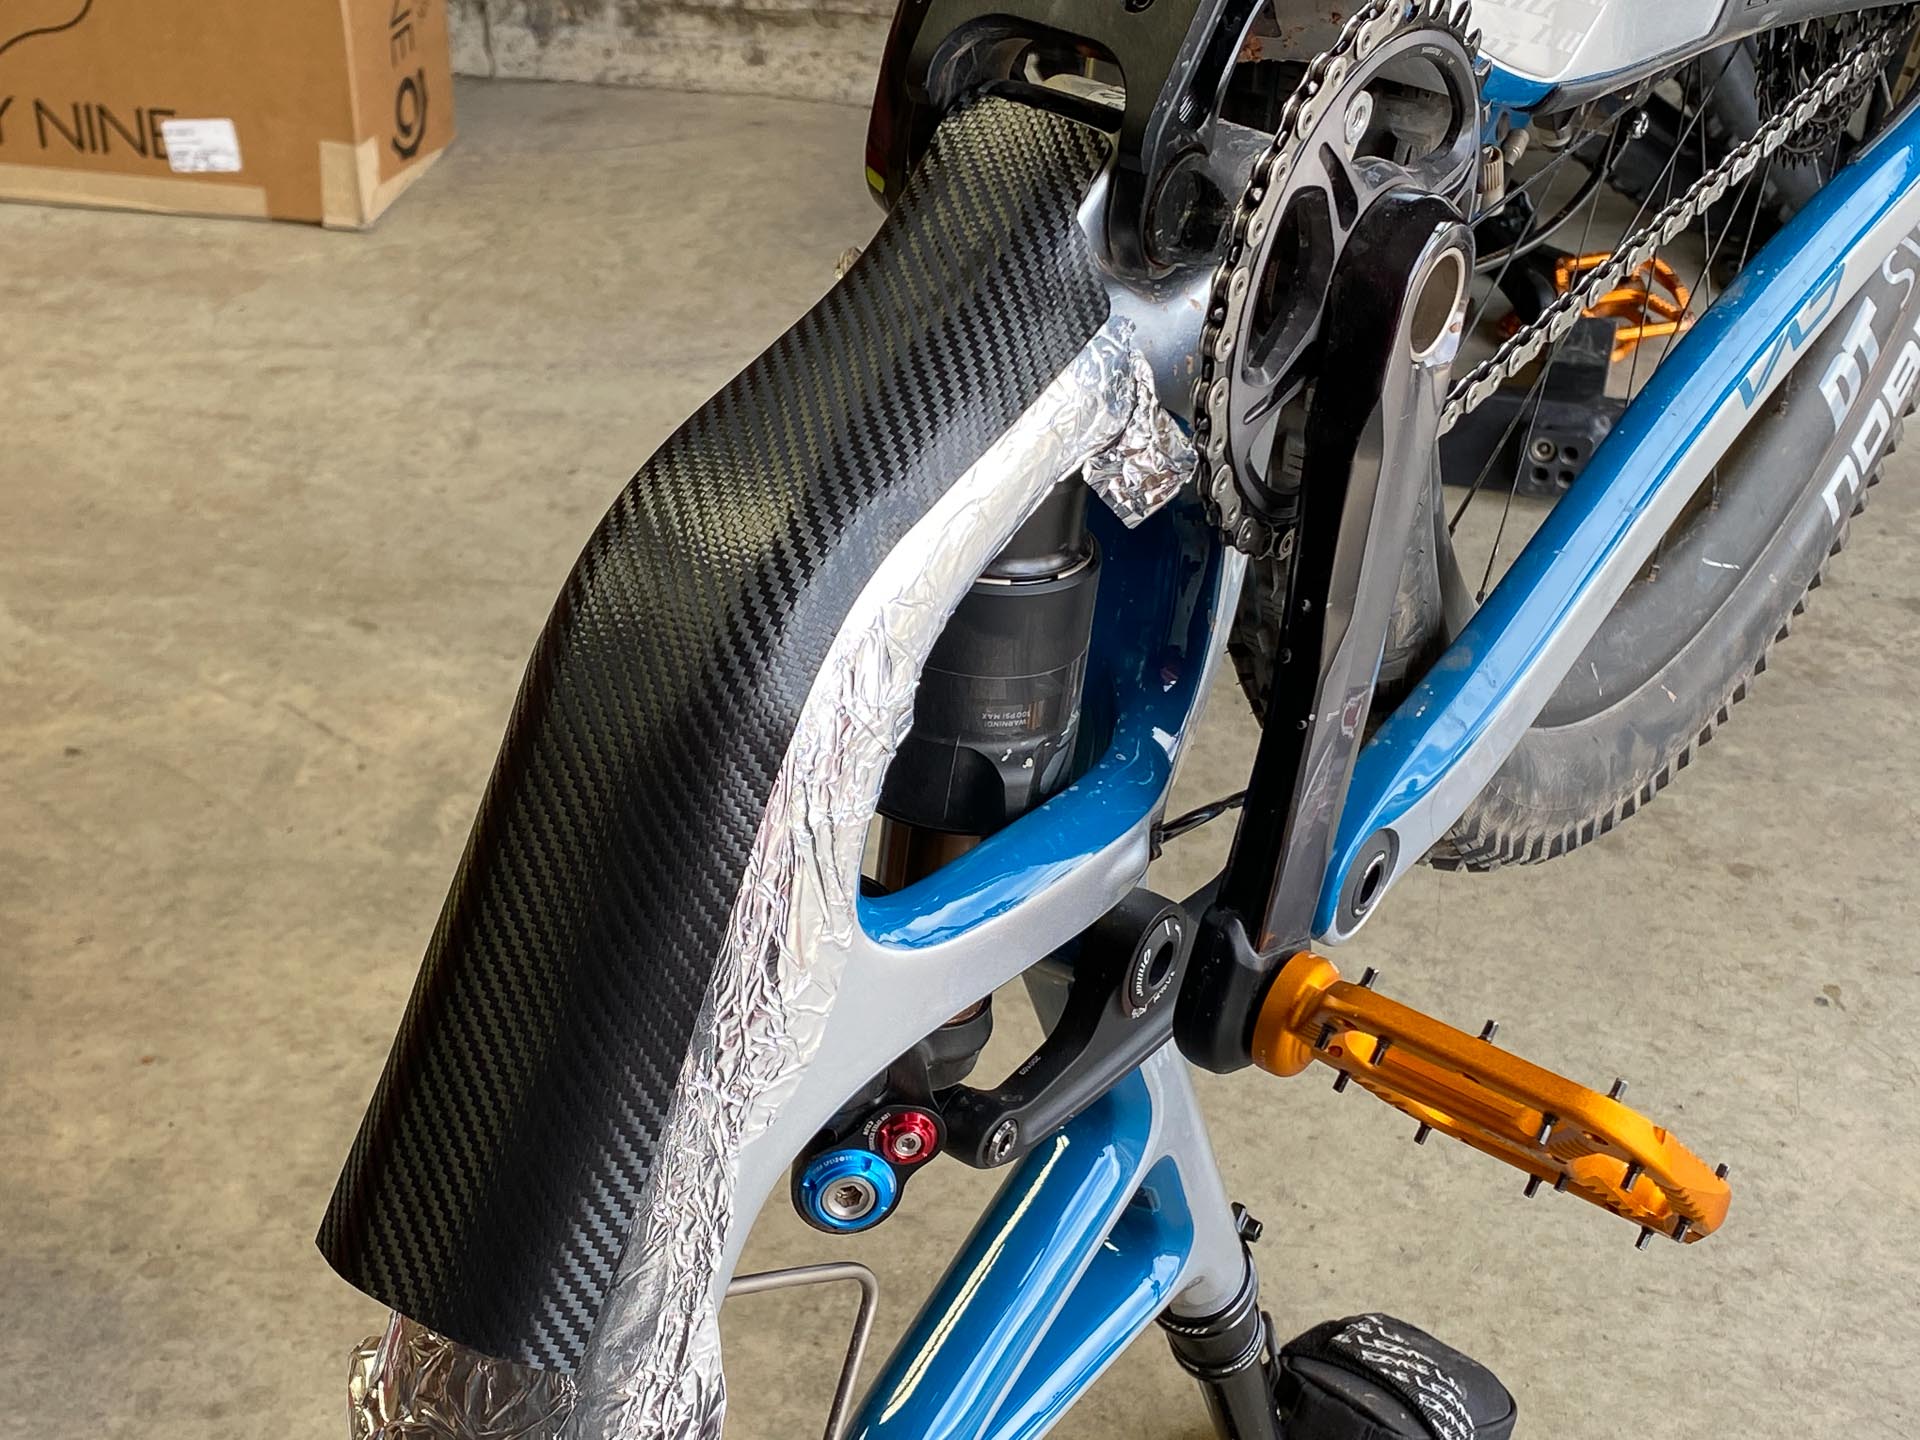
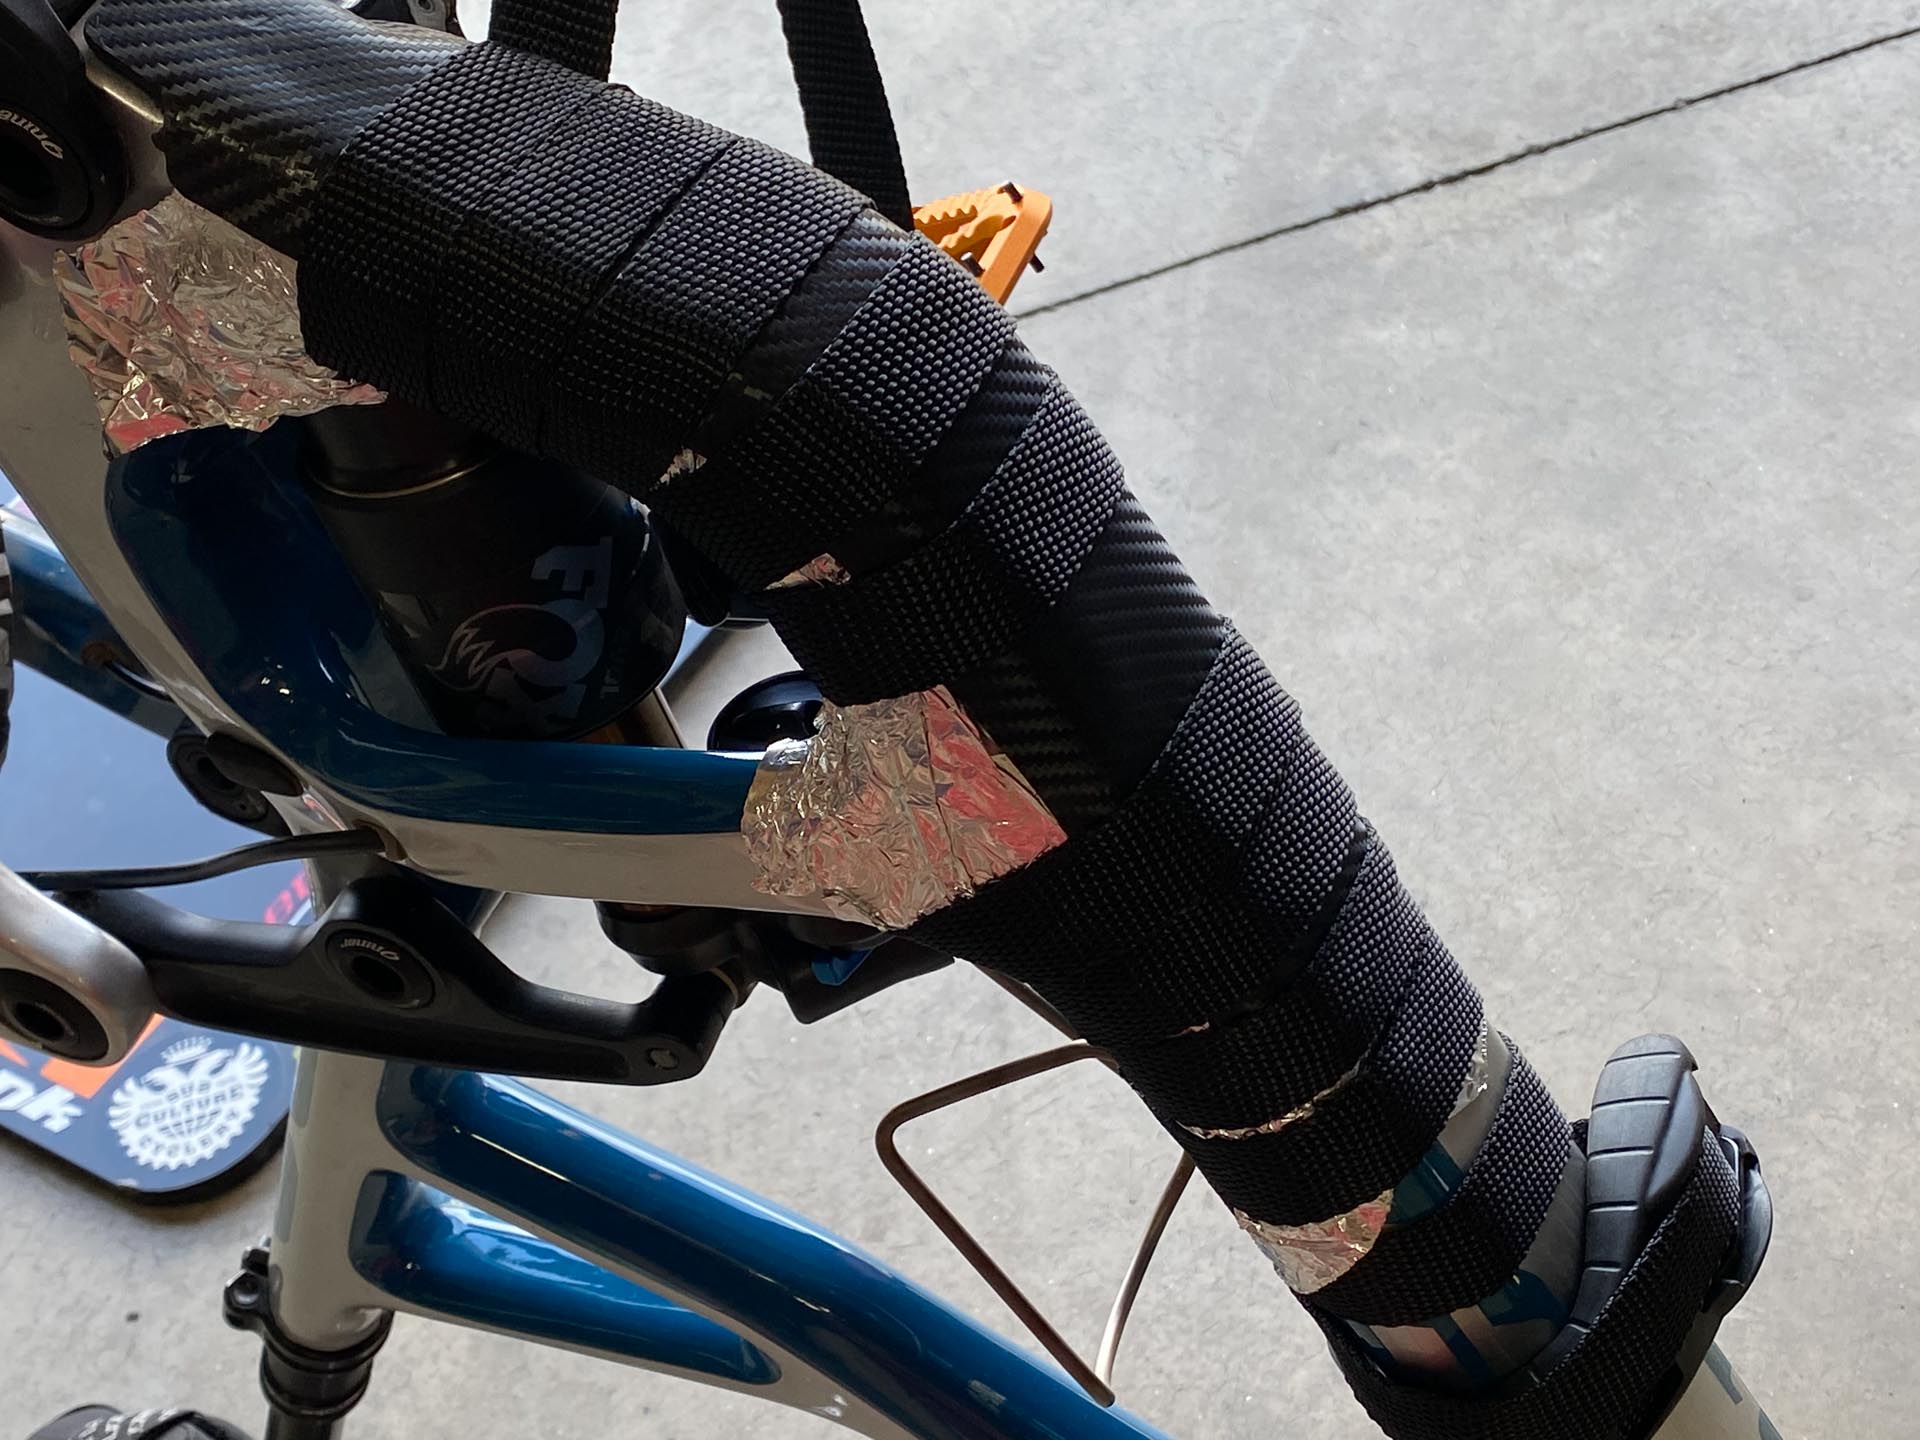
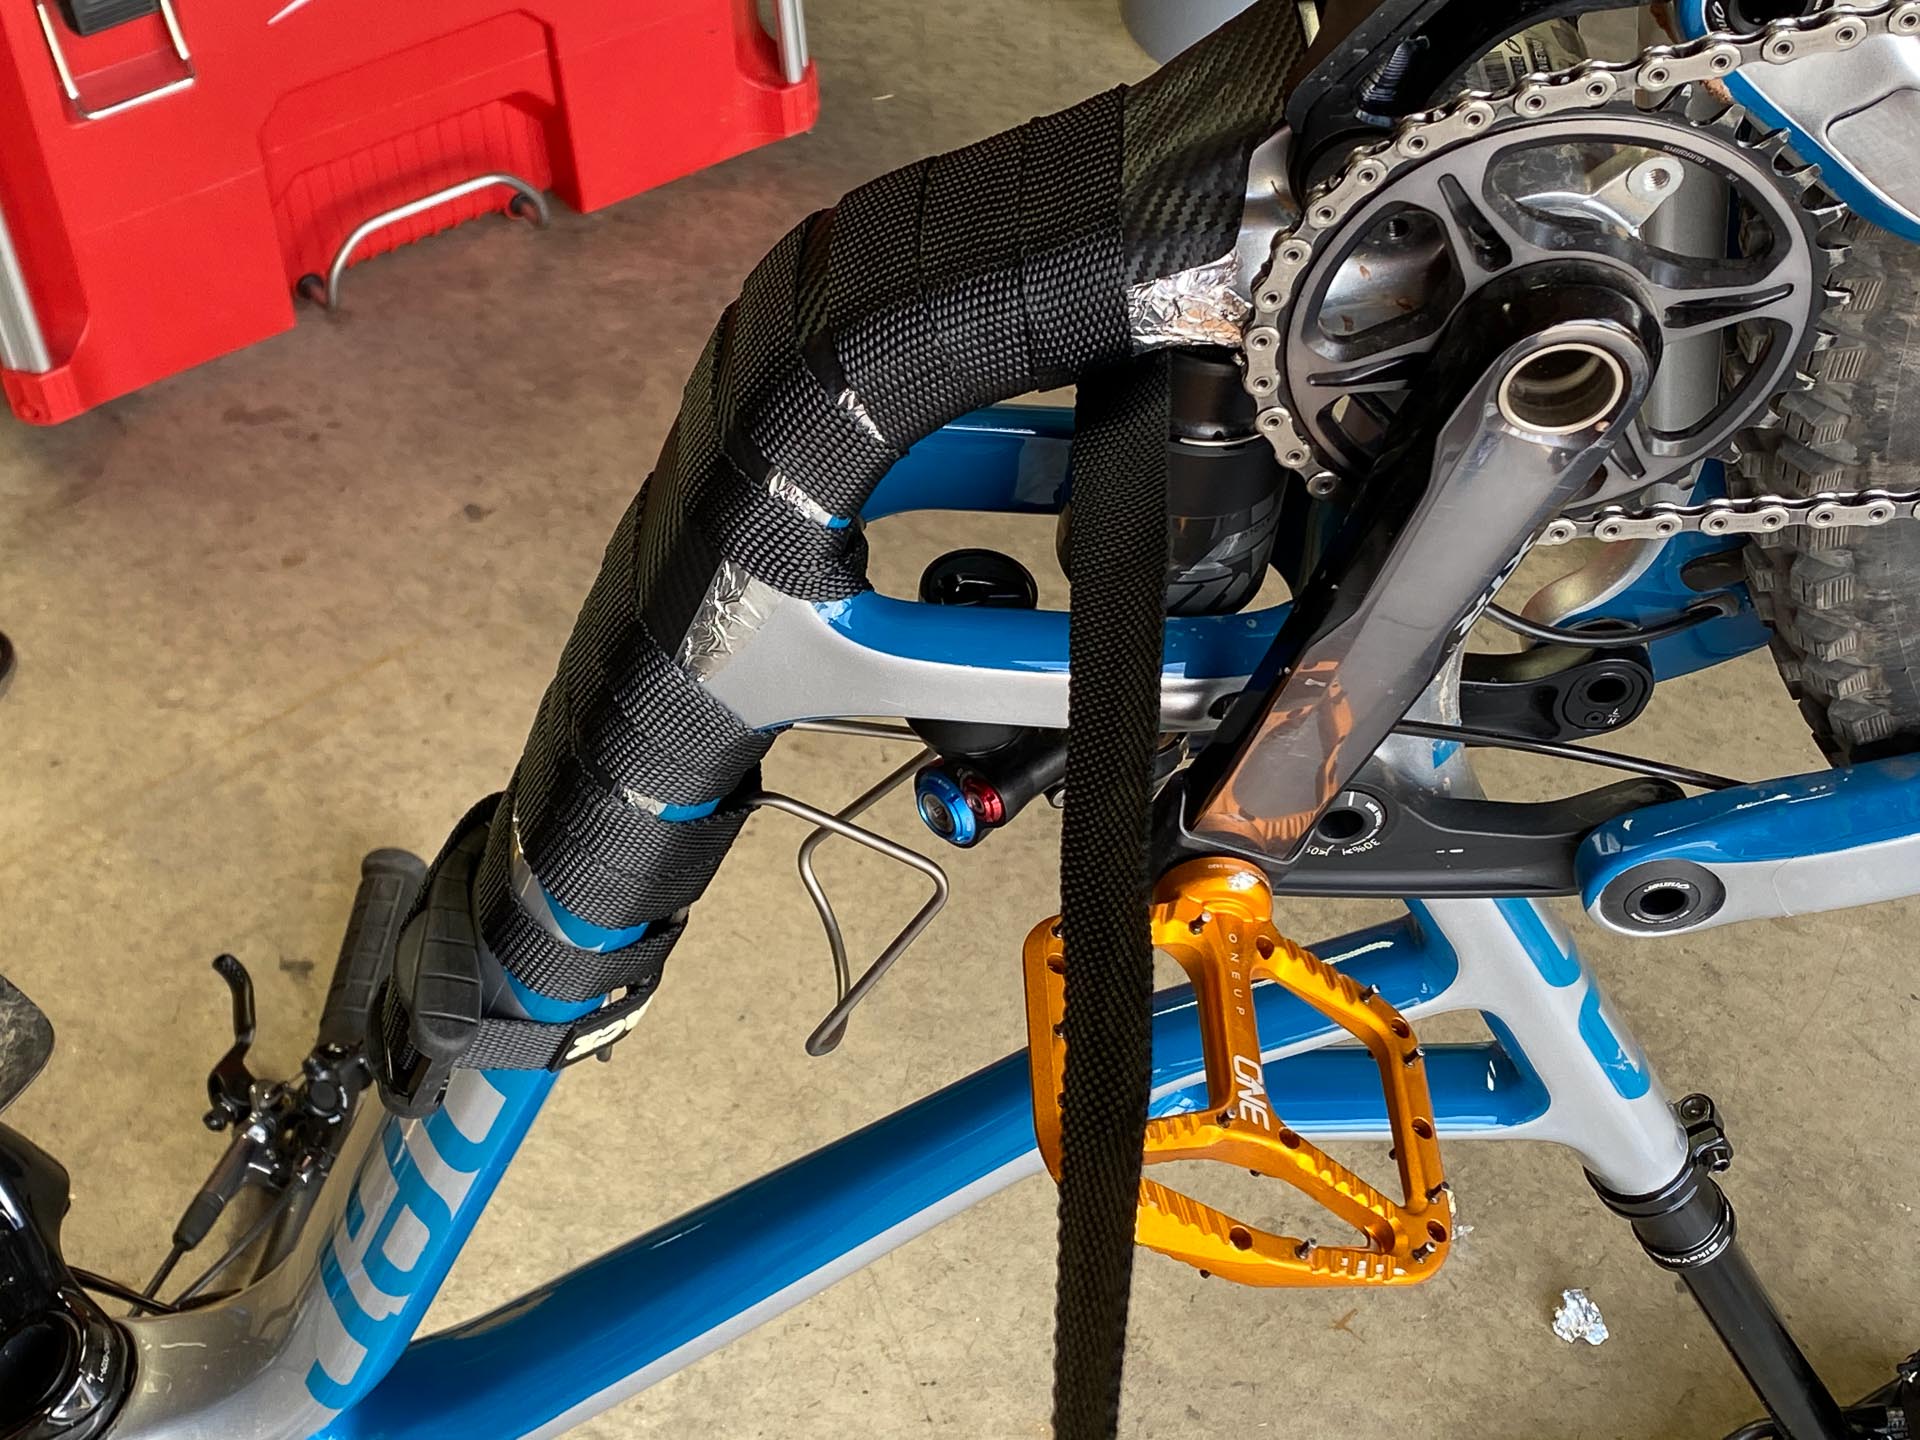
I started by putting down a layer of aluminum foil on the bike frame to protect the paint and frame from the heat gun. I then ran the heat gun up and down the Kydex until it got quite hot. You can tell because it goes from rigid to flexible as it warms up. If you heat it too much in one place, it will go very limp and possibly melt the top texture. I slowly worked it around the sides of the down tube curves. Protect your hands, it's hot! I used leather-palmed riding gloves. *shrug*
Step 5: Keep Molding
I was having a hard time getting the Kydex molded tightly around the complex curves of my Niner. For small items like knives and handguns, people often use some kind of press to put even pressure on the Kydex to form it tightly around complex shapes. The closest idea I could come up with is to wrap it with a nylon strap (like a ratchet strap). I secured the strap to the water bottle cage first, heated the lower part of the Kydex, then quickly and tightly wrapped the strap over that section. Then I moved up a bit… more heat, another wrap of the strap. Repeat all the way up. Near the bottom bracket, I just did the best I could working the strap around the shock and bottom bracket. Just hold the loose end of the strap tightly while the section of Kydex you just molded cools down. The smaller sections right under the BB I molded by pressing my gloved fingers on it until it cooled. Hot!
Step 6: Check Fit
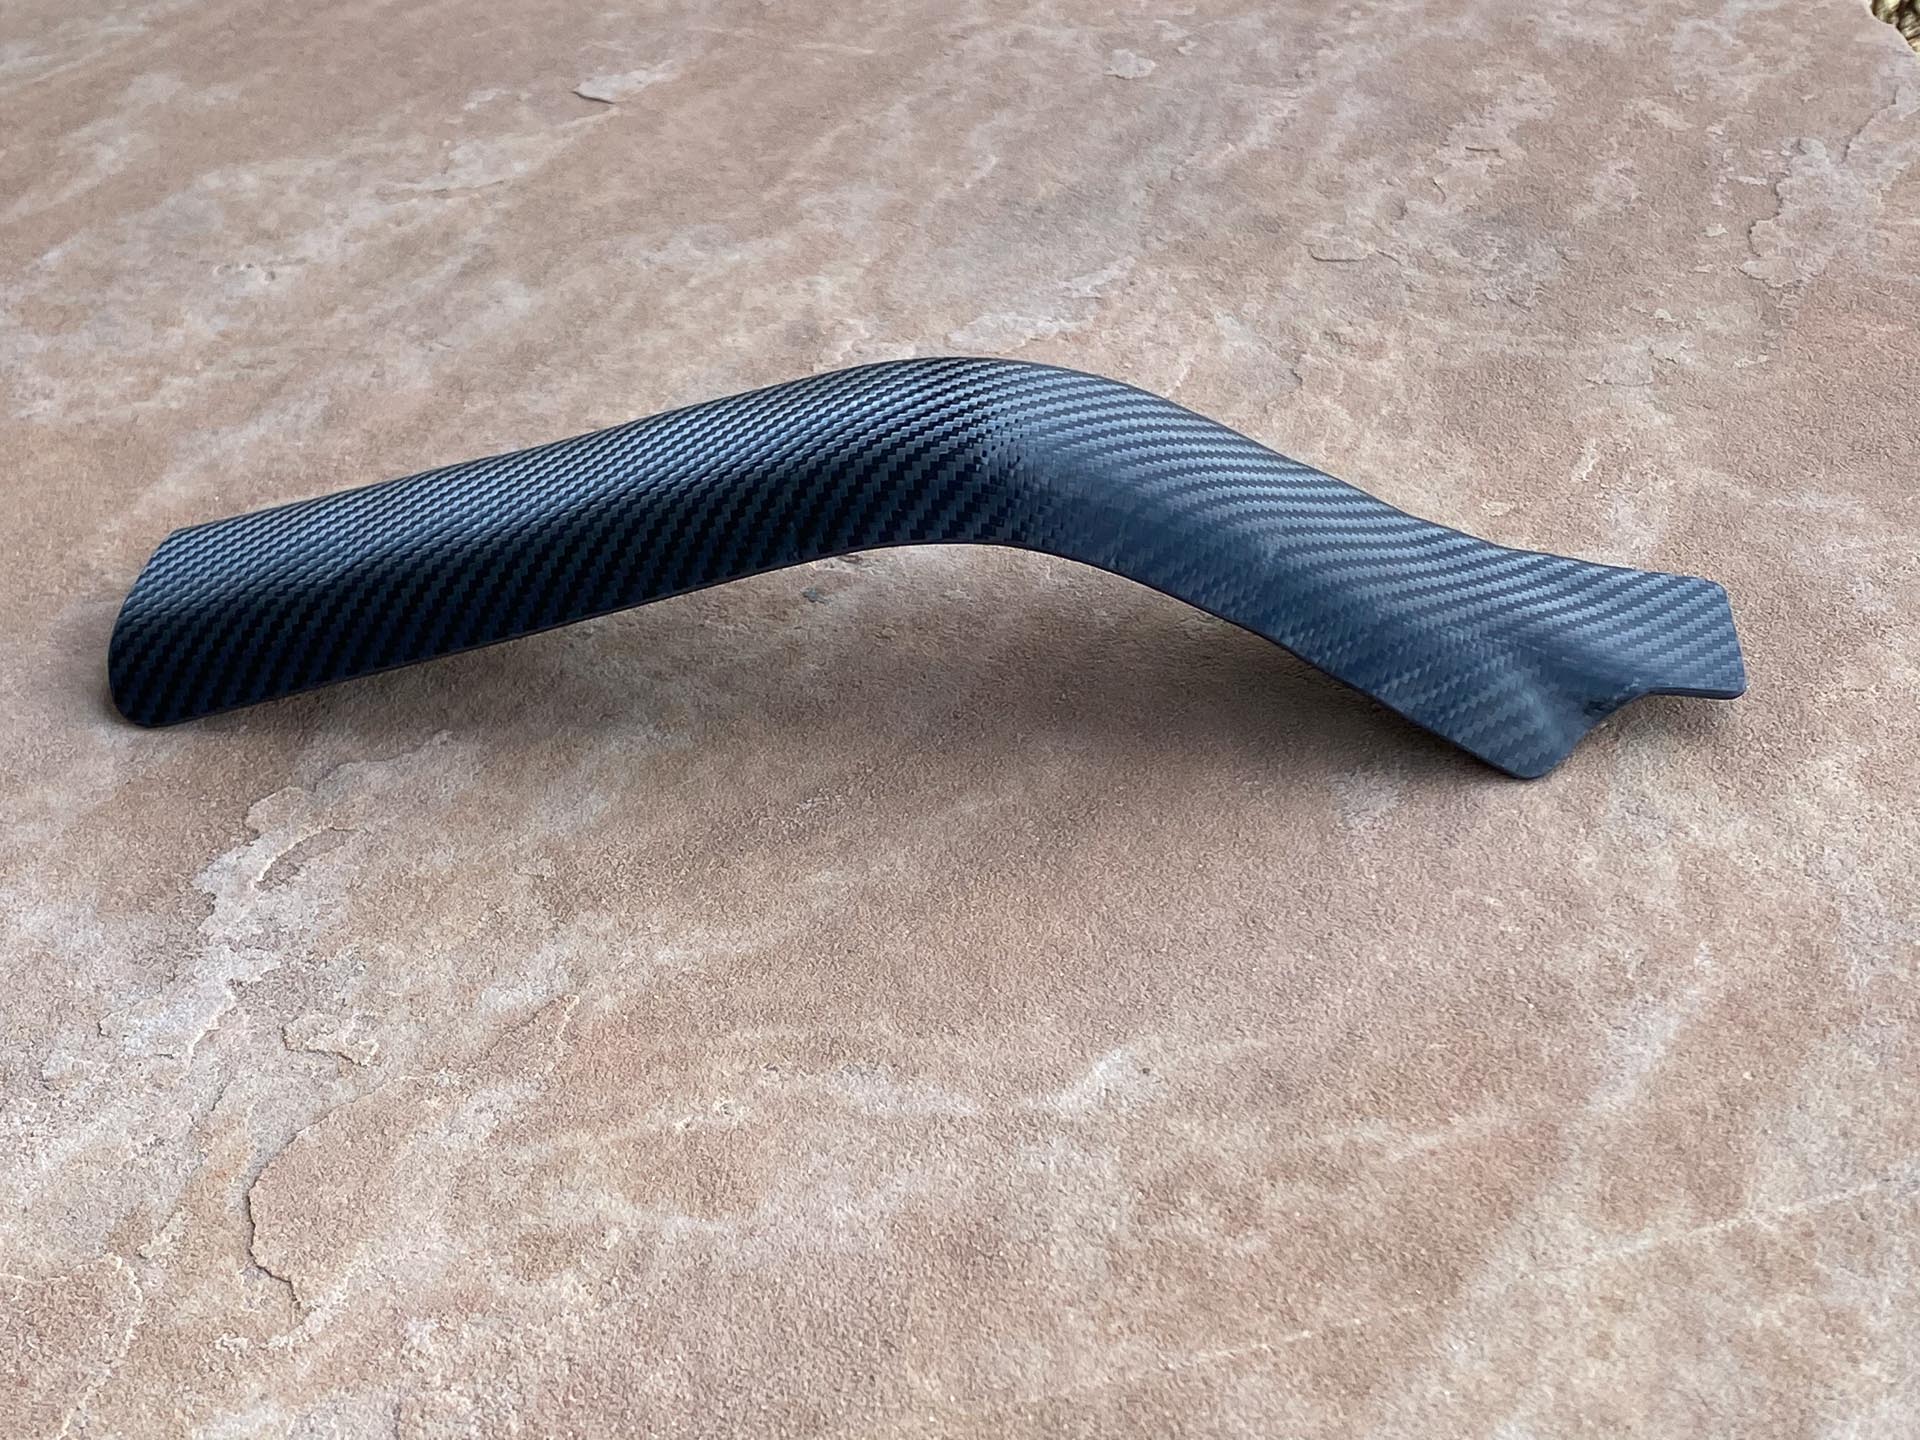
After it cools completely, pull the foil off the frame and check the fit. This photo shows my finished protector before adhering it to the frame. The strapping left some small lumps on one end of the protector, probably from inconsistent pressure on the strap. Not a big deal to me; once it's on the bike, it's not noticeable.
Step 7: Install
I lined the inside of the protector with 3M VHB double-sided foam adhesive tape. VHB is used a lot for automotive stuff and is outdoor rated. Perfect. It comes in various widths and lengths. The foam in the tape will allow it to take up small imperfections in my mold as well. Press it FIRMLY into the protector, then peel off all the backing. Very very carefully position it on your bike, starting with whichever section has the most critical fit. Then press it firmly to the frame and hold for a few seconds. VHB takes several hours for the adhesive to fully cure or adhere to an object, so be gentle with it the first day. In my case, the edges of the Kydex flared out a bit in spots, leaving a gap between the tape and frame. I simply heated up those areas with heat gun and pressed them inward toward the frame. The VHB held it in place nicely as it cooled. Perfect fit!
And with the two sheets I got for $25 , I have enough leftover to do another 2-3 protectors! Friends and beers welcome. :)


9 Comments
Great guide and pictures, thank you for this it helped me massively!
Awesome! Glad it was helpful!
Well done, sir! I’m going to attempt the same thing. Hopefully my results will be as good as yours.
How’s the tape holding up? I’m building up a light XC frame (Fezarri Solitude) and haven’t found any downtube protector to my liking. This both looks good and seems like it would protect very well.
So far so good! That 3M VHB tape is automotive grade, so it’s super durable stuff.
What about removing the protector from the frame when it needs replacing? Does that tape adhesive damage the finish at all to the frame when removed? Thanks, Bob
To be honest, it shouldn’t need replacing. Kydex is extremely hard and durable stuff. If you ruin it, your frame is likely also in bad shape or the bike will be too old to matter much. That said, the VHB tape has a foam center, so you can use dental floss or a thin wire and use it to “cut” the foam in half. Then you just need to remove the leftover adhesive from the bike frame. Look up automotive de-badging if you’re concerned, same thing. The adhesive won’t ruin the paint, as long as you don’t do anything silly trying to get it off. Use a hair dryer, Goo Gone, etc.
Thanks for the awesome tutorial. I had great luck making mine. Tin snips are a great way to cut kydex.
A couple of other observations:
VHB doesn’t have a cure time, according to 3M.
VHB can withstand upto 300F for a short period of time, which I found helpful after attaching the protector and a few spots along the edge were pulling back from the frame. BUT, it’s very easy to overly soften it, so make sure you are very minimal with heat at that point.
I did the initial heating on the bottom of a flipped cookie sheet (from the kitchen :D) inside my outdoor grill. I wore leather gloves to hold it down to the frame, and accidentally stretched the kydex, so be careful to only push down into the frame.
Awesome! Tin snips and the grill! Love it. Glad you found it helpful and appreciate you taking the time to share your tips.